A golf simulator means bringing the golf course straight to your home. Building your own golf simulator is always the best investment for your money, rather than spending thousands on a pre-built simulator. It is also cost-efficient, completely customizable, and brings the golf course to your home without leaving you stuck on the couch for these winter months! A DIY golf simulator offers something for everyone, from new golfers seeking a low-cost setup to seasoned golfers aiming for performance similar to professional installations.
This blog serves as a comprehensive guide for setting up your golf simulator at home, from selecting the appropriate equipment, such as the best golf simulator software & the best golf impact screen, to finding the ideal setting to set it up. By the end, you’ll know how to build a low-cost way to mimic the golf experience. Therefore, if you are prepared to begin practicing your swing at home, let us proceed.
Essential Equipment for a DIY Golf Simulator
Here are the essential parts you will need to start with:
Golf Net or Impact Screen: A best golf net is vital to catch the ball safely after every shot while providing you a realistic simulation experience.
Golf Mat: It is important to have the best durable golf mats to simulate the feel of turf.
Launch monitor: You need a launch monitor to measure ball speed, spin, and direction. It’s the core of your simulator and allows you to work on your swing. The best golf simulator software (for use with launch monitors)
Projector: If you intend to project a virtual golf course on your screen, the best golf simulator projector is needed for projecting a realistic atmosphere on the course.
Golf Simulator Software: Pick software that suits your level and preferences. Everything from simple shot tracking to incredibly detailed course simulations is available. For instance, software designed for beginners will likely incorporate more simple-to-use features than software designed for professionals.
With the necessary gear, setup, and details described above, you’ll be one step closer to creating a fully immersive and effective DIY golf simulator setup. You are welcome to reach out if you are keen to explore any of these pieces more in-depth!
Step-by-Step Guide: How to Build Your Own Golf Simulator
Designing your own golf simulator may sound like an overwhelming task to take on, but with the right equipment and preparation, it can be accomplished. Use this step-by-step guide to put together a quality DIY setup that suits your space and budget:
Step 1: Find the Right Space
To help you get started, the first important procedure commonly needed is to get an appropriate space in your home. A garage, basement, or any other big room that has enough space for your golf mat and simulator setup will do. Ideally, this means a minimum 35-foot ceiling height, 9–10 feet of room, full swing, etc. Ensure you’ve got ample space for the best golf mat and the best golf nets, plus additional space for your projector and screen.
Step 2: Create the hitting zone.
Put your best golf mats up where you’ll strike your shots. The spot will be where you spend most of your time, so you’ll want to have it situated comfortably. Install a golf impact screen or net that is capable of absorbing a golf shot without the ball bouncing off or causing damage. So be sure your impact screen is mounted correctly and designed for repeated impacts.
Step 3: Set Up the Launch Monitor and Connect to the Software
For the next shot, get your launch monitor ready. It’s the core of your simulator, so be sure to select one compatible with your simulator software. If you wish, you can start it and run the best golf simulator software on your PC or tablet! That will be essential for logging ball information such as speed, spin, and distance.
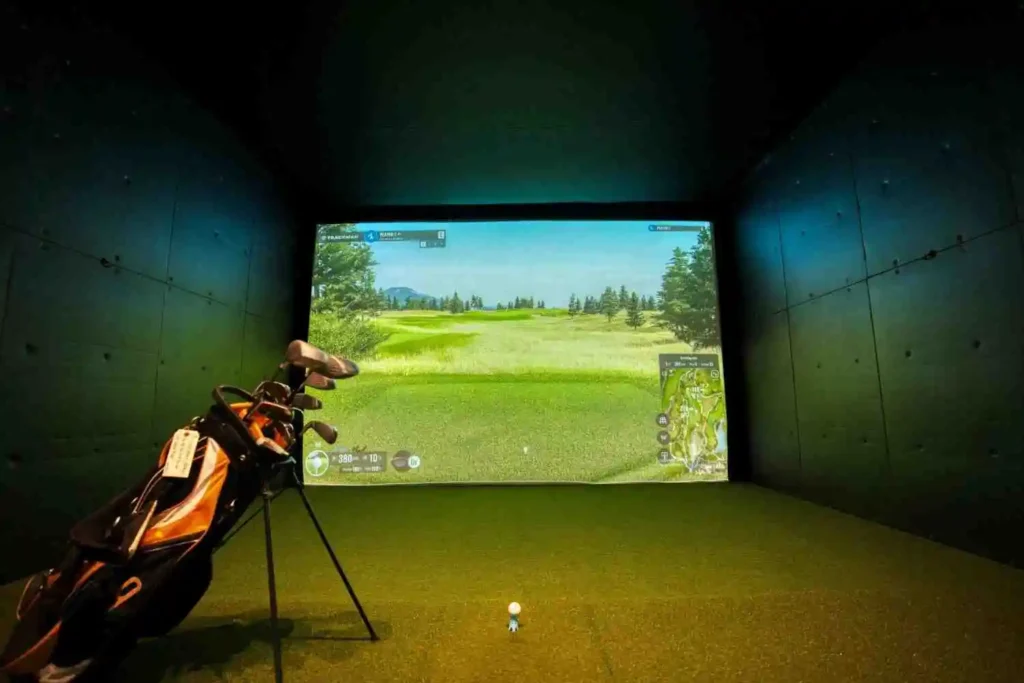
Step 4: Add a Projector to Make It Real
The other key install to complete your setup is a best golf simulator projector. This will present the virtual golf course on your impact screen/net. Check that the projector’s resolution and brightness fit your space. It must provide a good view always, even in low-light conditions.
Step 5: Fine-Tune Your Setup
When everything is set up, give your simulator a try. Customize the settings to ensure maximum effectiveness and comfort. Make sure to calibrate your launch monitor, align your projectors to your screen, and set your software to accurately read course data. Be sure to check your setup regularly for issues and make changes to ensure your golf simulator is always performing at peak performance.
This guide will get you started on building a great DIY golf simulator!
Budget vs. Premium DIY Golf Simulator Setups
The DIY golf simulator is available as both low-priced home putter ranges and high-end setups, depending on your wallet and your preferences. Here are some of the most significant differences and considerations:
Budget DIY Golf Simulator
Golfers who wish to maintain their game without incurring significant costs can opt for a budget setup. Key features include
- Affordable Mats and Nets: The best golf mat and golf hitting net are cost-effective options to practice indoors. They won’t last as long as premium models, but they will serve the purpose for casual players.
- Launch Monitors: A few inexpensive launch monitors interface with your device and give you basic data like ball speed and distance—all you need for players who are novice to intermediate.
- Software: You can pay for some decent software solutions designed for online learning with some basic features and limited access to courses. Those are the ones that work well for casual golfers who want to practice their swing without shelling out too much money.
Premium DIY Golf Simulator
We also provide premium setups for best-in-class features if you’re willing to spend a little extra for a top-tier experience:
- High-Quality Mats and Nets: Value Golf Net and Mat: Built to withstand years of use, the golf net and mat provide a realistic turf feel. Impact screens are premium; they make sure to catch the balls safely and give a more realistic ball-tracking experience.
- Launch Monitors: High-end monitors will track advanced metrics like club path, spin, and launch angle to give you a detailed breakdown of your performance. These systems also tend to offer improved accuracy and reliability.
- Software: High-end devices provide immersive experiences with motion tracking, customizable settings, and integration with swing analysis. These programs tend to offer more courses and customization options for players who want an authentic experience.
Which One Should You Choose?
Whether you choose budget or premium is purely a matter of your requirements. The ultimate budget golf simulator for DIY will work for you if you are just beginning and want a less complex setup. However, if you’re a serious golfer or simply seek the highest level of detail and accuracy, opt for a premium setup.
Common Mistakes to Avoid When Setting Up Your DIY Golf Simulator
If you ever decide to build a DIY golf simulator, this can be an exciting project; however, there are common mistakes that many people make. By avoiding these pitfalls, you can ensure a smooth setup process and enjoy a high-quality golfing experience right in your own home. As you proceed, here are some key mistakes to steer clear of:
- Neglecting to consider space needs
The most common mistake is not measuring the space where you are going to install your simulator correctly. Have enough space for your golf practice net, golf chipping net, mat, projector, and swing area. Without space, the simulator experience is cramped and unenjoyable.
- Utilizing Poor Mats and netting
Despite the temptation to cut costs by purchasing cheap mats and nets, doing so will negatively impact your experience. Cheap mats can mar your clubs, and cheap nets may not last. If you don’t have access to a golf driving range, a budget-friendly golf hitting net or a Spornia golf net could be a good investment, as they are durable and realistic in potentially catching balls.
- To Miscalibrated the Launch Monitor
Your game will improve if you have accurate data. If you haven’t calibrated your launch monitor properly, those inaccuracies will impact your practice sessions. Spend some time properly setting up and calibrating the monitor as per the software’s instructions. It’s a critical part of accurate ball tracking.
- Choosing the Right Software for Your Needs
Not all golf simulator software is the same. Some work well for novices, and others are more advanced in the game. Using software that’s either too tough (beyond your current experience) or trivial (not aligned with your goals) can greatly diminish your experience. Therefore, it is advisable to conduct thorough research on the features and capabilities of each software before making a purchase.
- Neglecting Maintenance
Just like any other equipment, you will also need to maintain your DIY golf sim regularly. Keep your golf impact screen and more in excellent sound condition. Check for wear and tear regularly and make repairs before it becomes a significant issue.
Customer Reviews and Real DIY Success Stories
Many golfers love making their own home golf simulators. Some highlights include the following:
- Positive Experiences: Customers frequently express satisfaction with the value and personalization found in DIY simulators, sharing how they have optimized their game by practicing at home on a regular basis.
- Challenges:A few customers report the initial installation being a bit complicated and the time it takes to refine elements (launch monitors, software, etc.). But most people agree the effort pays off in results.
Real-world experiences foster trust and give people the impression that, with proper planning, a DIY golf simulator can truly provide professional-level practice at home.
Why Trust Our Recommendations?
Our recommendations come on the back of a lot of research and a huge amount of experience in the golfing and affiliate marketing industries. We base our recommendations on real user feedback, product features, and expert reviews to ensure their excellence. No matter if you are a beginner or a seasoned pro, you can trust our expertise for the perfect DIY golf simulator setup.
Conclusion
When avoiding making a cheap DIY golf simulator, it is important to make sure you carefully consider the space you have available, your budget, and the quality of the components you choose. It doesn’t matter if you’re going with a budget or high-end setup; the important factor is to merge all components—leading from golf practice nets to golf simulator projectors—harmoniously to create a profound and enjoyable experience.
You can save yourself time and effort by not making the same mistakes as others, and you can get the right software and equipment to work on a high-quality simulator that is close to perfect. Ready to transform your game? You can still plan your DIY golf simulator setup today!
FAQs
How much space do I need for a DIY golf simulator?
We recommend a minimum setup size of 10′ high, 10′ wide, and 12′ deep to allow for comfortable movement.
Would it be possible to build a golf simulator on a budget?
Can I do this on a budget — like with a cheap golf mat or net, or even a low-cost launch monitor?
What software do I need for my DIY golf simulator?
Golf simulator software uses ball tracking and features to enhance or simulate a real game experience. Pick one according to your skill level.
How accurate are DIY golf simulators?
A DIY golf simulator can be very accurate if you use high-quality components and calibrate everything right.
Is a DIY golf simulator for fitness portable?
Absolutely! A lot of players use simulators to practice their swing, to work on their form, and to keep active.
Are there any portability features with DIY golf simulators?
Aspects like the portable golf simulator can be set up or moved into different spaces, making them suitable for those with limited room.